Chi Gun Stretches
Chigun has many faces. The word itself covers both martial and meditation techniques, and these techniques are so different, sometimes you wonder how could they end up under the same name.
In this article I am going to focus on part of what I call "Chigun warm-up", a rich set of routines that allows you to make your body stronger, more flexible - AND to help your "chi" to move.
Also, at the beginning, it is a good way to discover, how many muscles are there in a human body, and how sore they can be.
The "Chigun hands routine" we are going to study works with your forearms and fingers, stretching ligaments, enchancing muscles and so on. I used it to treat the tunnel syndrom, too.
1.
1.1.
We begin in Jan Joan position. All little things that you can find by following the link above apply, or the exercise will not work.
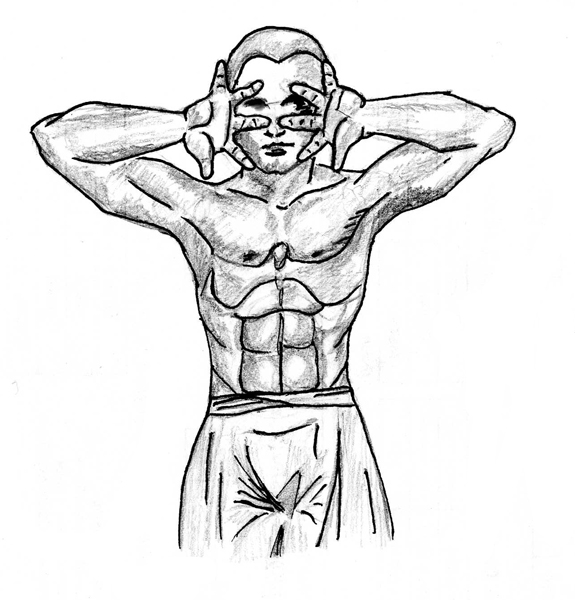
Now, remaining in Jan Joan, turn your hands, palms outside and raise palms to the eye level.
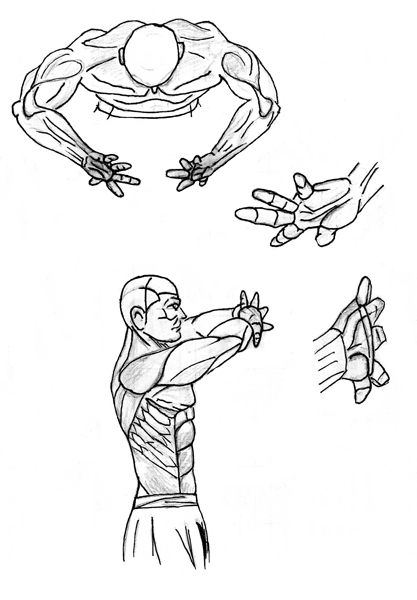
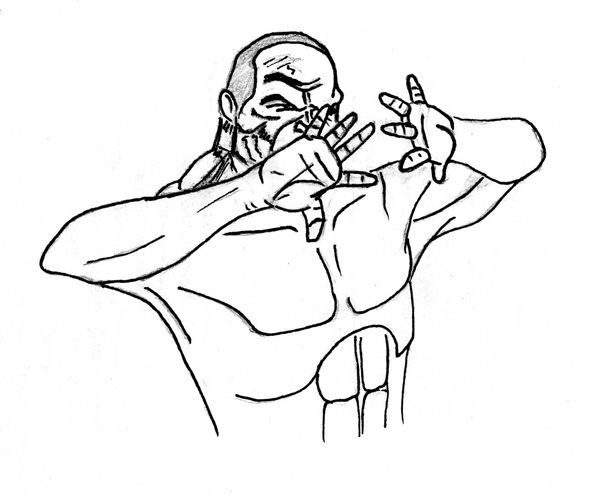
Open your palms, spreading fingers as wide as you can. The idea is to stretch every finger, trying to kind of make it longer.
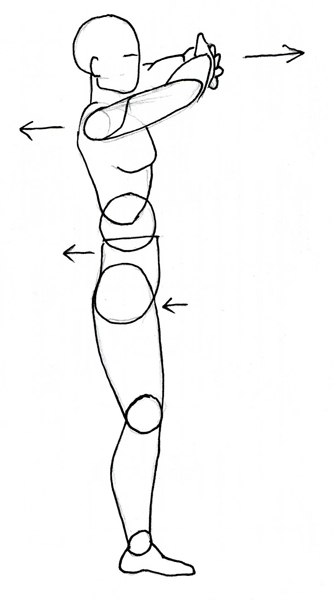
Push forward with your palms, as if your hands and your back (the area between shoulder blades), are pushing on the large ball - from inside, extending it. Note, that the position is still Jan Joan, you shouldn't bend forward or back.
Once again, palms should push forward. This part is usually a simple one to do. In the same time, the area of your back, that is located between shoulder blades should push back.
There are two ways of pushing back with that area: the right one and the wrong one, The right one involves moving your shoulders forward, while the backbone itself remains straight and vertical.
The WRONG way to do it, is by bending your backbone, as if you are trying to look down.

Do it 3 times, allowing 3-5 seconds for each push.
Shake your hands. This is an important part of the technique, and you need to do it after each exercise described here. Shake hands whatever way you feel necessary to relax your wrists and shoulders, just try to avoid abrupt jerking in unpredictable directions.
Do shaking as long as you did the exercise itself. Once again, repeat it after every exercise, 1.1 - shaking; 1.2 - shaking, and so on.
1.2.
Turn left, and push 3 times again. By turning, I mean that your body, hips and shoulders, turn to about 45 degrees, while your feet remain in the same position, not moving.
To turn your body properly, you must follow instructions from Jan Joan description, again. The body should be aligned properly, in the article awailable by the link, I am explaining what it means. Just briefly: pay attention at alignment of hips and shoulders, knees and feet, otherwise you will only achieve sthetching and physical workup, but no progress with your "chi".
If, however, you do techniques properly, you will feel your palms becoming not just warm, but burning hot, which is one of the signs of "chi" moving.
1.3.
Turn right, and push 3 times again.
Repeat 1.1 - 1.3, 3 times. This is not a requirement, but rather a recomendation. Doing it less than 3 times will, most likely, be insufficient, doing it more than 3 times is ok, but it does take time, and we usually do not have it.
Additional notes. You should breath out when pushing out, you may also bend your knees a bit more than in a relaxed Jan Joan position, but it is not mandatory. You should, however, keep your lower back (the min-men point) flat, rather than curved, your neck should produce a slight stretch up (see Jan Joan), and at all times during the push, your fingers should be stretching out.
2.
The second exercise is identical to the first one, except this time you keep your fingers as tight together as possible.
Compare:
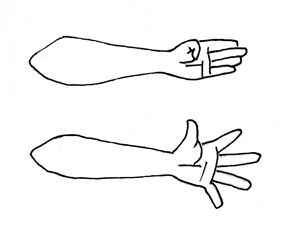
There should be a stretch in your fingers, same way as before, going along the palm and fingers, as if you tried to use your muscles to make your fingers longer.
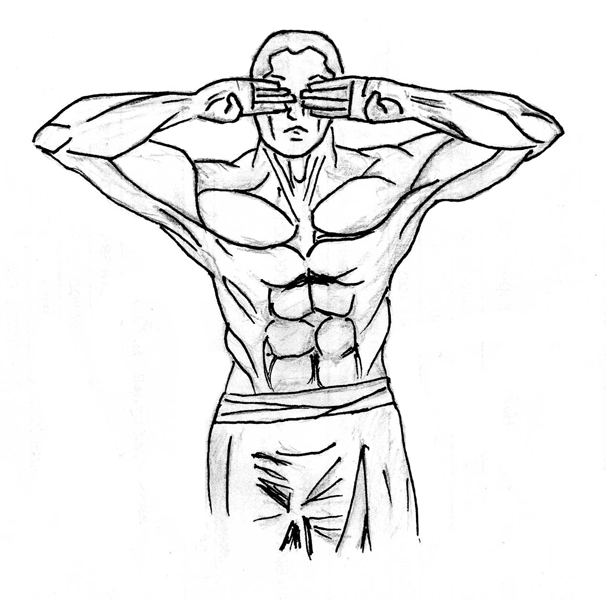
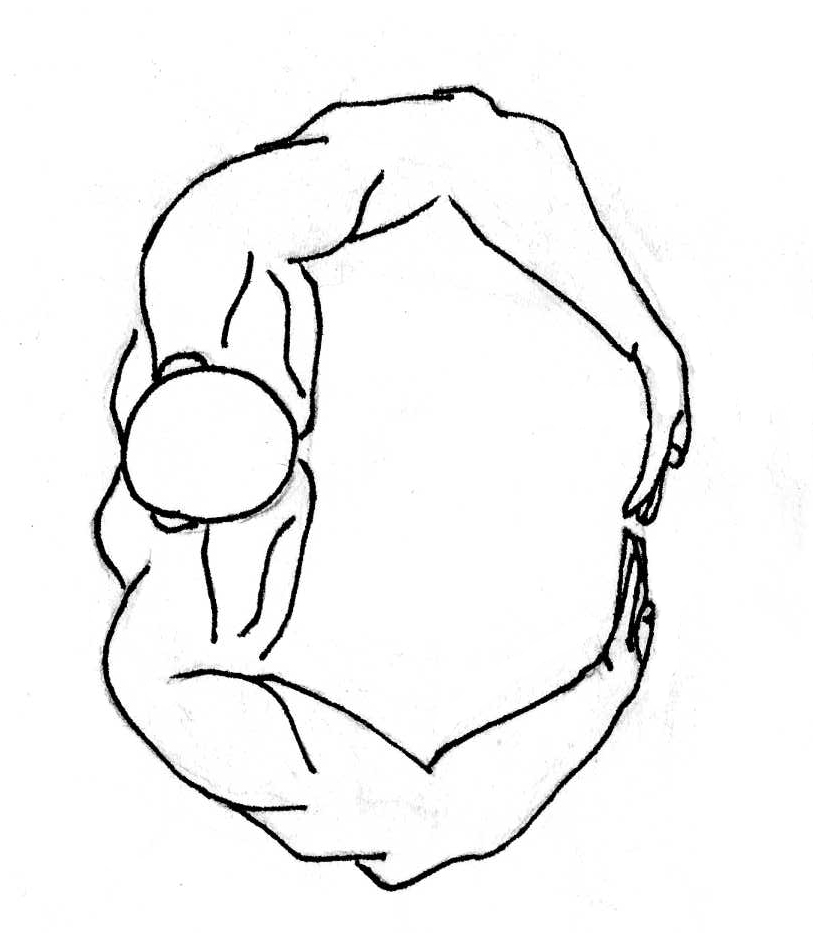
Push forward, 3 times, push left, 3 times, push right, 3 times.
3.
3.1.
Straighten your hands, extending them forward. This is one of very few Chigun techniques, where you see elbows being completely straight. Now you have straight hands, palms OUT (left palm to the left, right pelm to the right).
Bend your wrists inside (fingers of opposite hands towards each other). This is the initial position.
Bend your wrists outside.
Note, that the beginner's natural reaction is to bend elbows, and put hands down. You should resist it. Anso, shoulders should not go up - it will create extra pain, but no gain, so to speak.
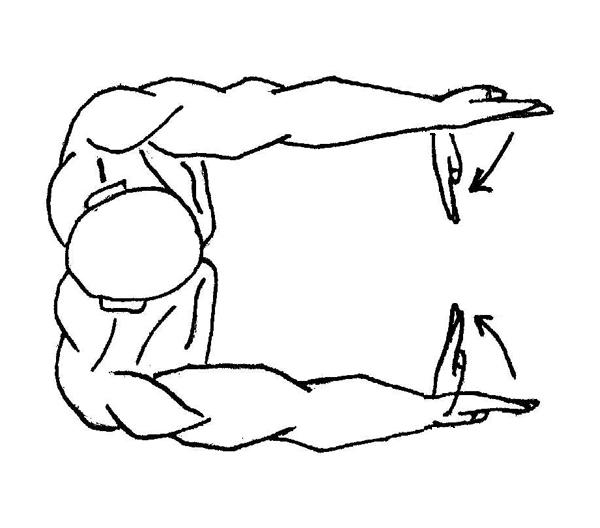
Repeat the "inside - outside" cycle 30 to 50 times.
3.2.
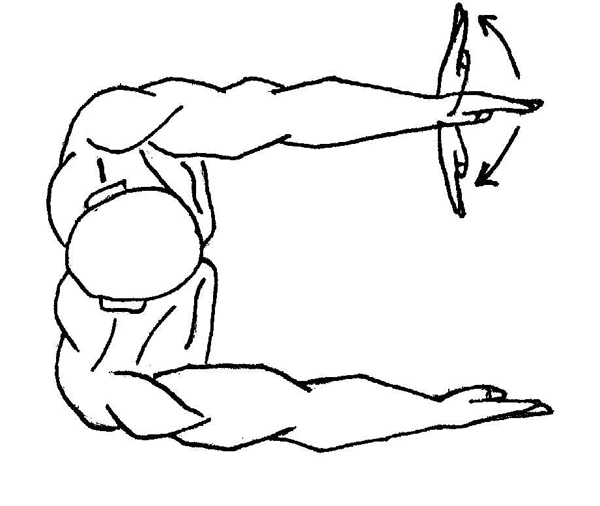
Asume the initial position, as in 3.1, palms turned inside this time. Keep your elbows straight.
Bend wrists in and out, 30-50 times.
4.
4.1.
Asume the initial position, as in 3.1, palms turned outside. Turn wrists inside, so that fingers of the opposite hands are pointing towards each other.
In the following exercise, the accent should be on closing your fist, as if you catch a fly. Close the fist fast and with some extra strength (it means, you put more power, than is required to simply bring your fingers together. It is not enough to catch the imaginary fly - you need to squeeze it).

Repeat the cycle "close fist - open fist" 30 to 50 times.
4.2.
Now we are going to focus on opening the fist, instead of closing it.
Repeat the cycle "close fist - open fist" 30 to 50 times.
4.3., 4.4
Turn wrists outside, so that fingers of the opposite hands are pointing away from each other. The rest of the exercise is identical to 4.1 and 4.2.
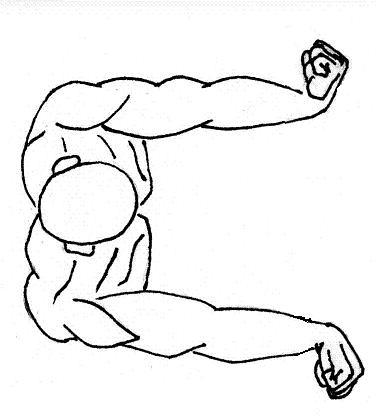
Again, keep in mind, that a beginner CAN NOT NOT TO break the rules, he/she will bend elbows, put hands down and raise shoulders. He/she will also reduce (unconsciously, of course) the angle at which wrists are bent.
It is ok, just keep switching your attention between the checkpoints: elbows - straight, wrists - bent, back - flat, nech - stretched, shoulders down, and again: elbows...
This is why it is called Chi Gun - the WORK of "chi".
